Burn DMG (macOS Installer) to USB or DVD in Windows
DMG files are designed for macOS and cannot be accessed natively on Windows. However, there are rare situations where Mac users may need to open and handle these files on a Windows operating system, especially if they want to create a bootable macOS installer using Windows. When the built-in Internet Recovery feature on your Mac doesn’t work, having the DMG version of the macOS installer may come in handy. You can burn or flash the macOS installer (DMG version) to a USB or DVD using a Windows computer. This will allow you to create an installation medium on Windows and proceed with the recovery process on your Mac.
In Windows or Mac, copying data to a DVD is commonly referred to as burning because we use a laser to burn tiny lines onto a disc’s surface while adding data to it. Here in this article, we also use the title “burn” because it has become a synonym for the act of putting something into a storage media, though the technology is different when it comes to USB. That being said, if you wish to burn or flash a DMG file like “Install macOS DMG” to a USB or DVD on Windows, you need to have a few tools and hardware at your disposal.
- Windows PC: We use Windows 11 PC with Intel Core i3 Processor 8GB RAM (Windows 8 & above recommend)
- TransMac (trialware) or Balena Etcher (freeware): Software for burning DMG file to DVD/USB
- To flash DMG to USB: A USB disk with GPT partition scheme and at least 8GB -16 GB space.
- To burn DMG to DVD: A dual-layer DVD and an external USB DVD Drive (if there is no inbuilt DVD hardware support on your PC/Mac).
Above all, the bootable DMG version of the macOS installer is a must. Please note that the macOS DMG you download from Apple is not bootable; you need to convert that app/pkg version to a DMG file before you can burn or flash it to a USB drive or DVD.
How to flash DMG to USB on Windows for bootable installer
Nowadays, USBs are being used more frequently than DVDs because modern PCs and Macs no longer come fitted with DVD slots. In addition, transferring data between a Mac and a PC is much simpler and faster when using a USB disk. Therefore, if you plan to flash a macOS DMG file into a bootable medium, it is better to select a USB disk for this purpose.
- Download and install Balena Etcher for Windows
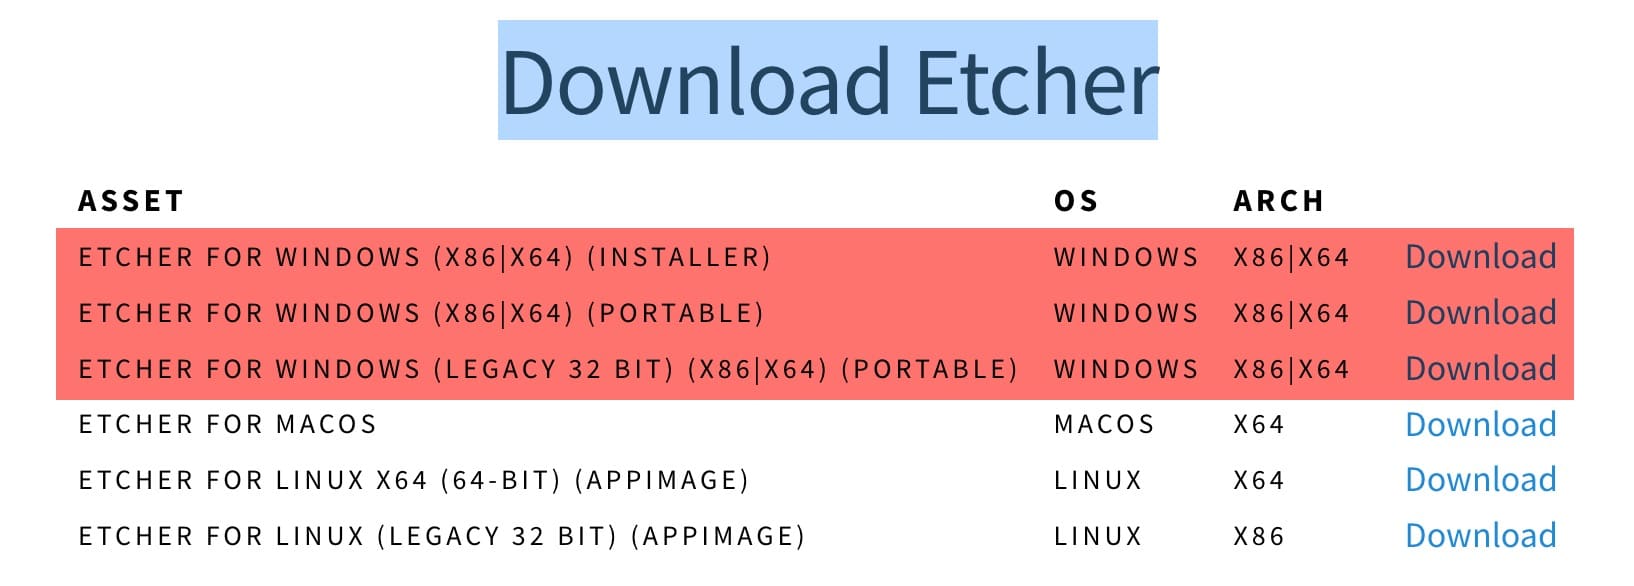
Visit the official website, scroll-down a bit, and download the latest version of Etcher for Windows. According to you your system configuration, choose between the software’s 32-bit, 64-bit, or portable version. Alternatively, if you have Windows 11/10 installed on your PC, you can directly download Etcher 1.19.25 by following this link. Once the download is complete, double-click the Etcher .exe file to start the installation process on your computer.

- Download macOS DMG ( bootable macOS installer) to your PC
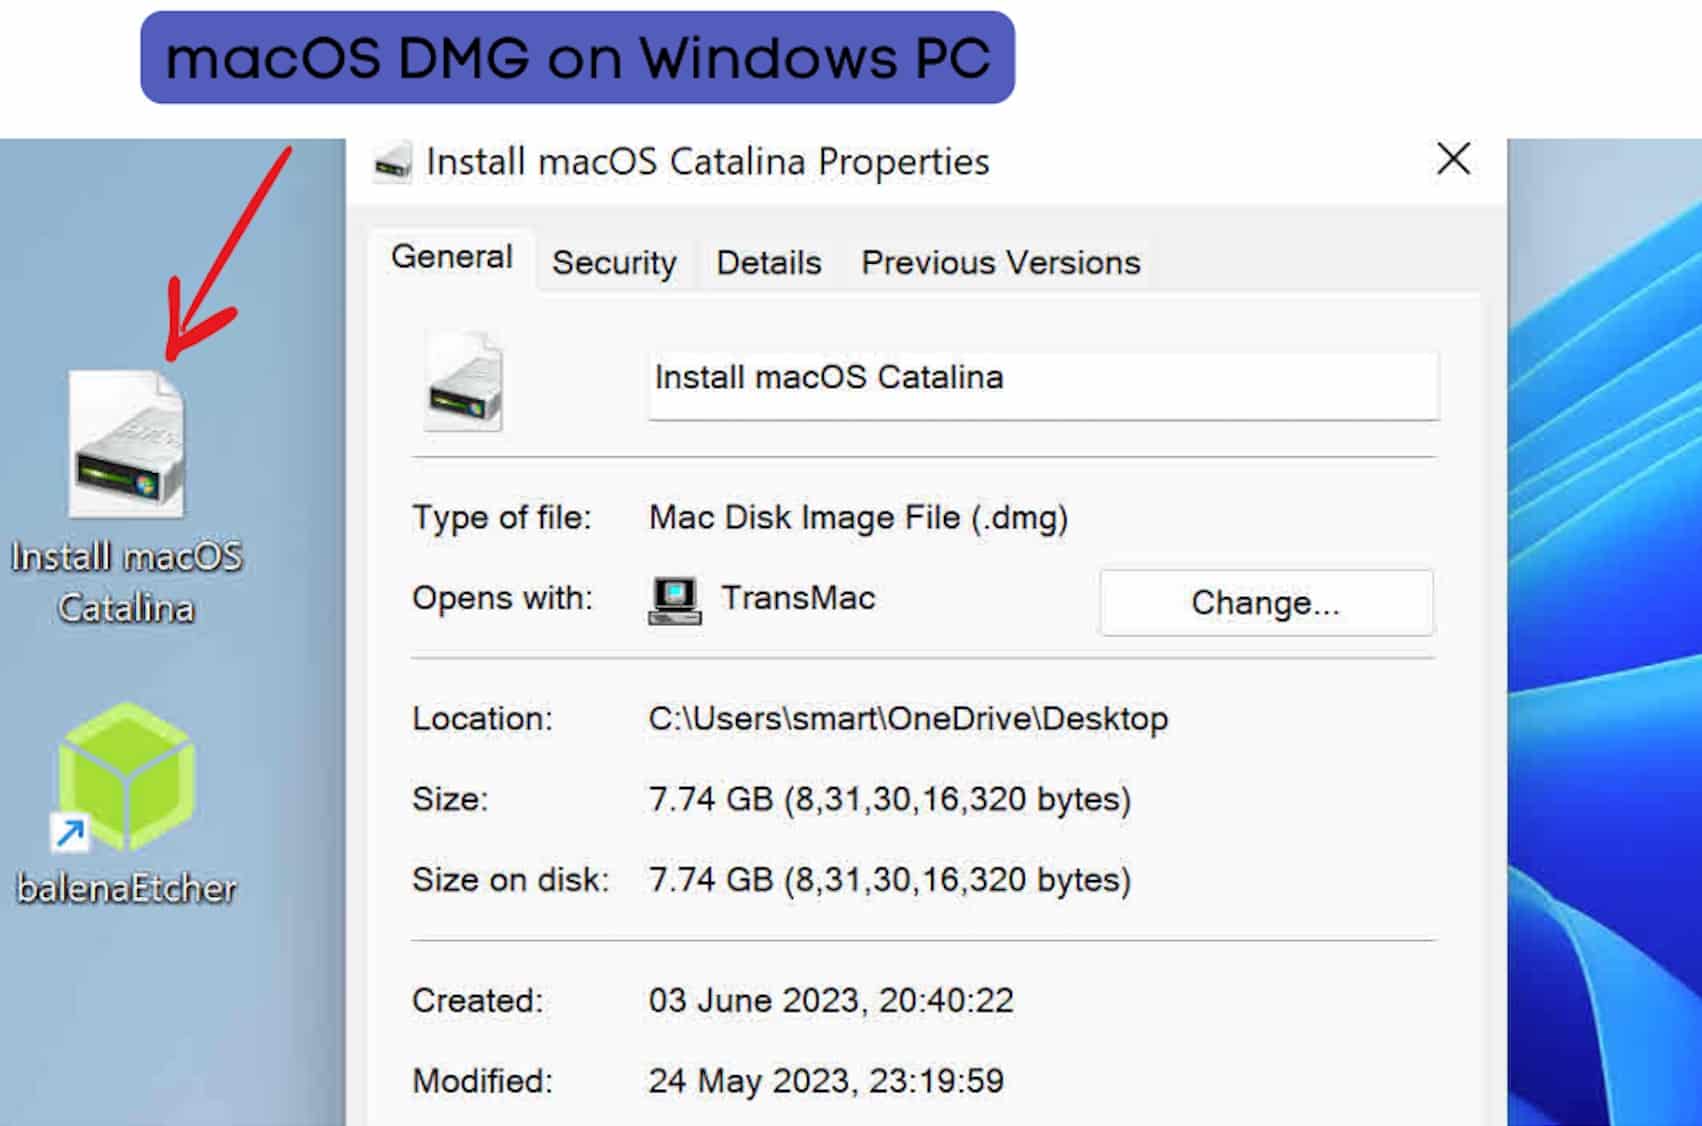
Balena Etcher supports multiple Windows disk image formats such as ISO, IMG, and macOS format DMG. As we are working with a macOS DMG installer in this case, please download or transfer the DMG file (boot-friendly version) of your choice to the Windows PC. As an example I’ve added a macOS Catalina DMG file on my desktop.

- Open Etcher, select macOS DMG and target USB disk
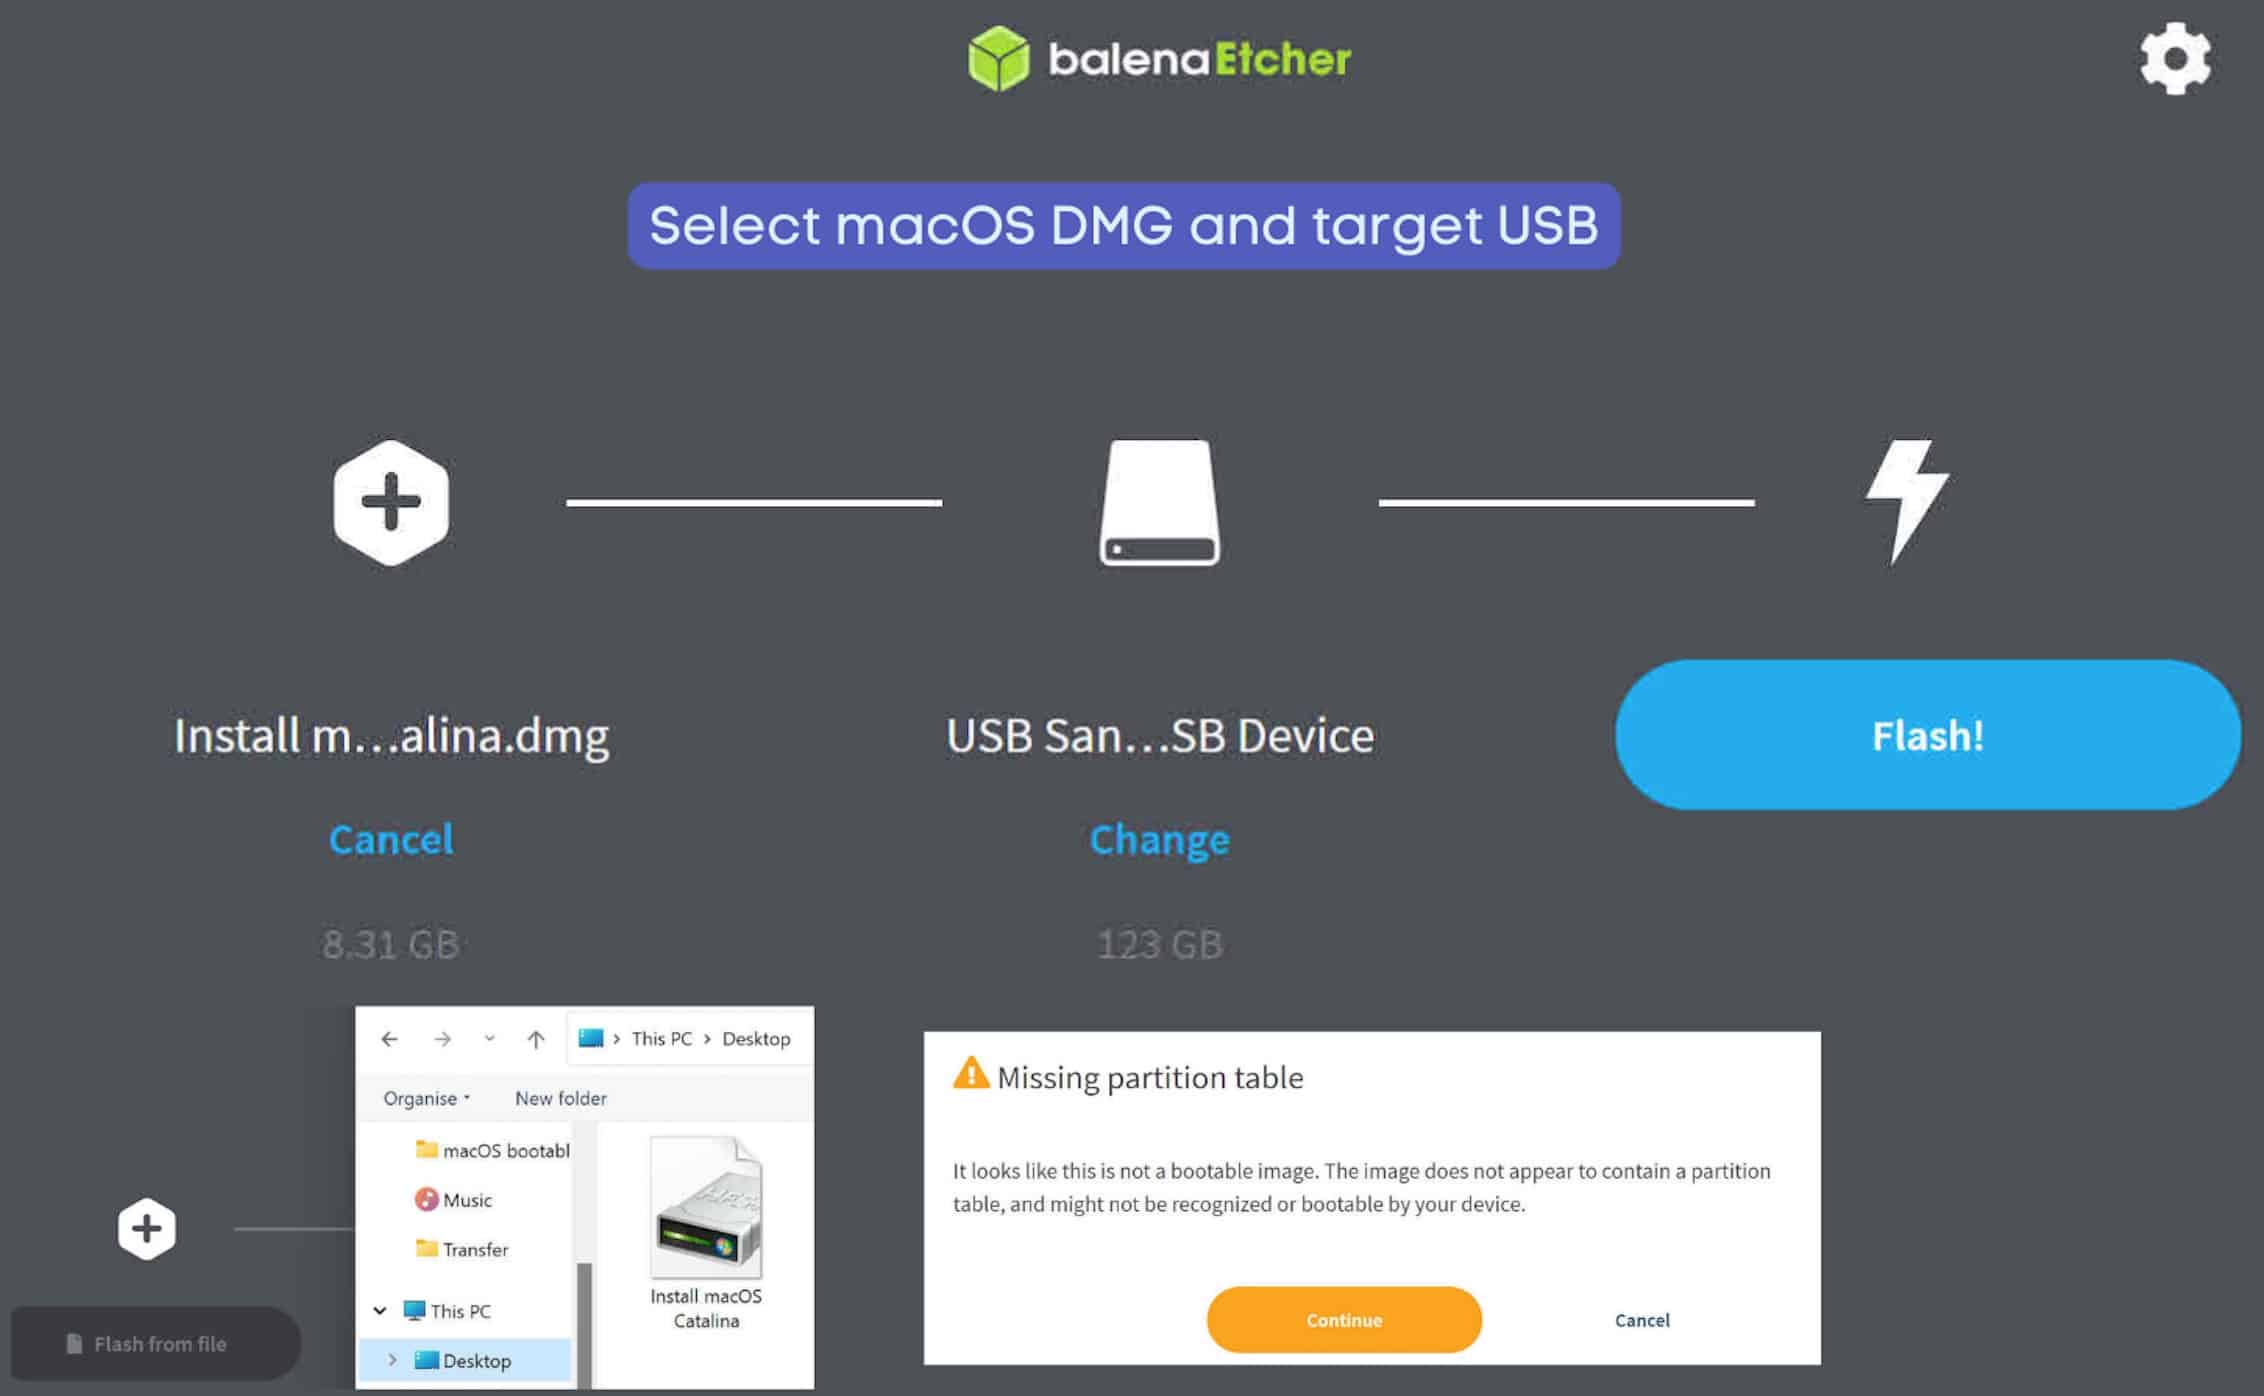
Double-click the Etcher application’s desktop icon to open its interface, as shown below. Make sure that you are on the “Flash from file” tab, and then select the macOS DMG file present on your Windows desktop folder. Also, pick the target USB disk that we will convert into a bootable macOS installer. If you see a “missing partition table” error, ignore it and click continue.

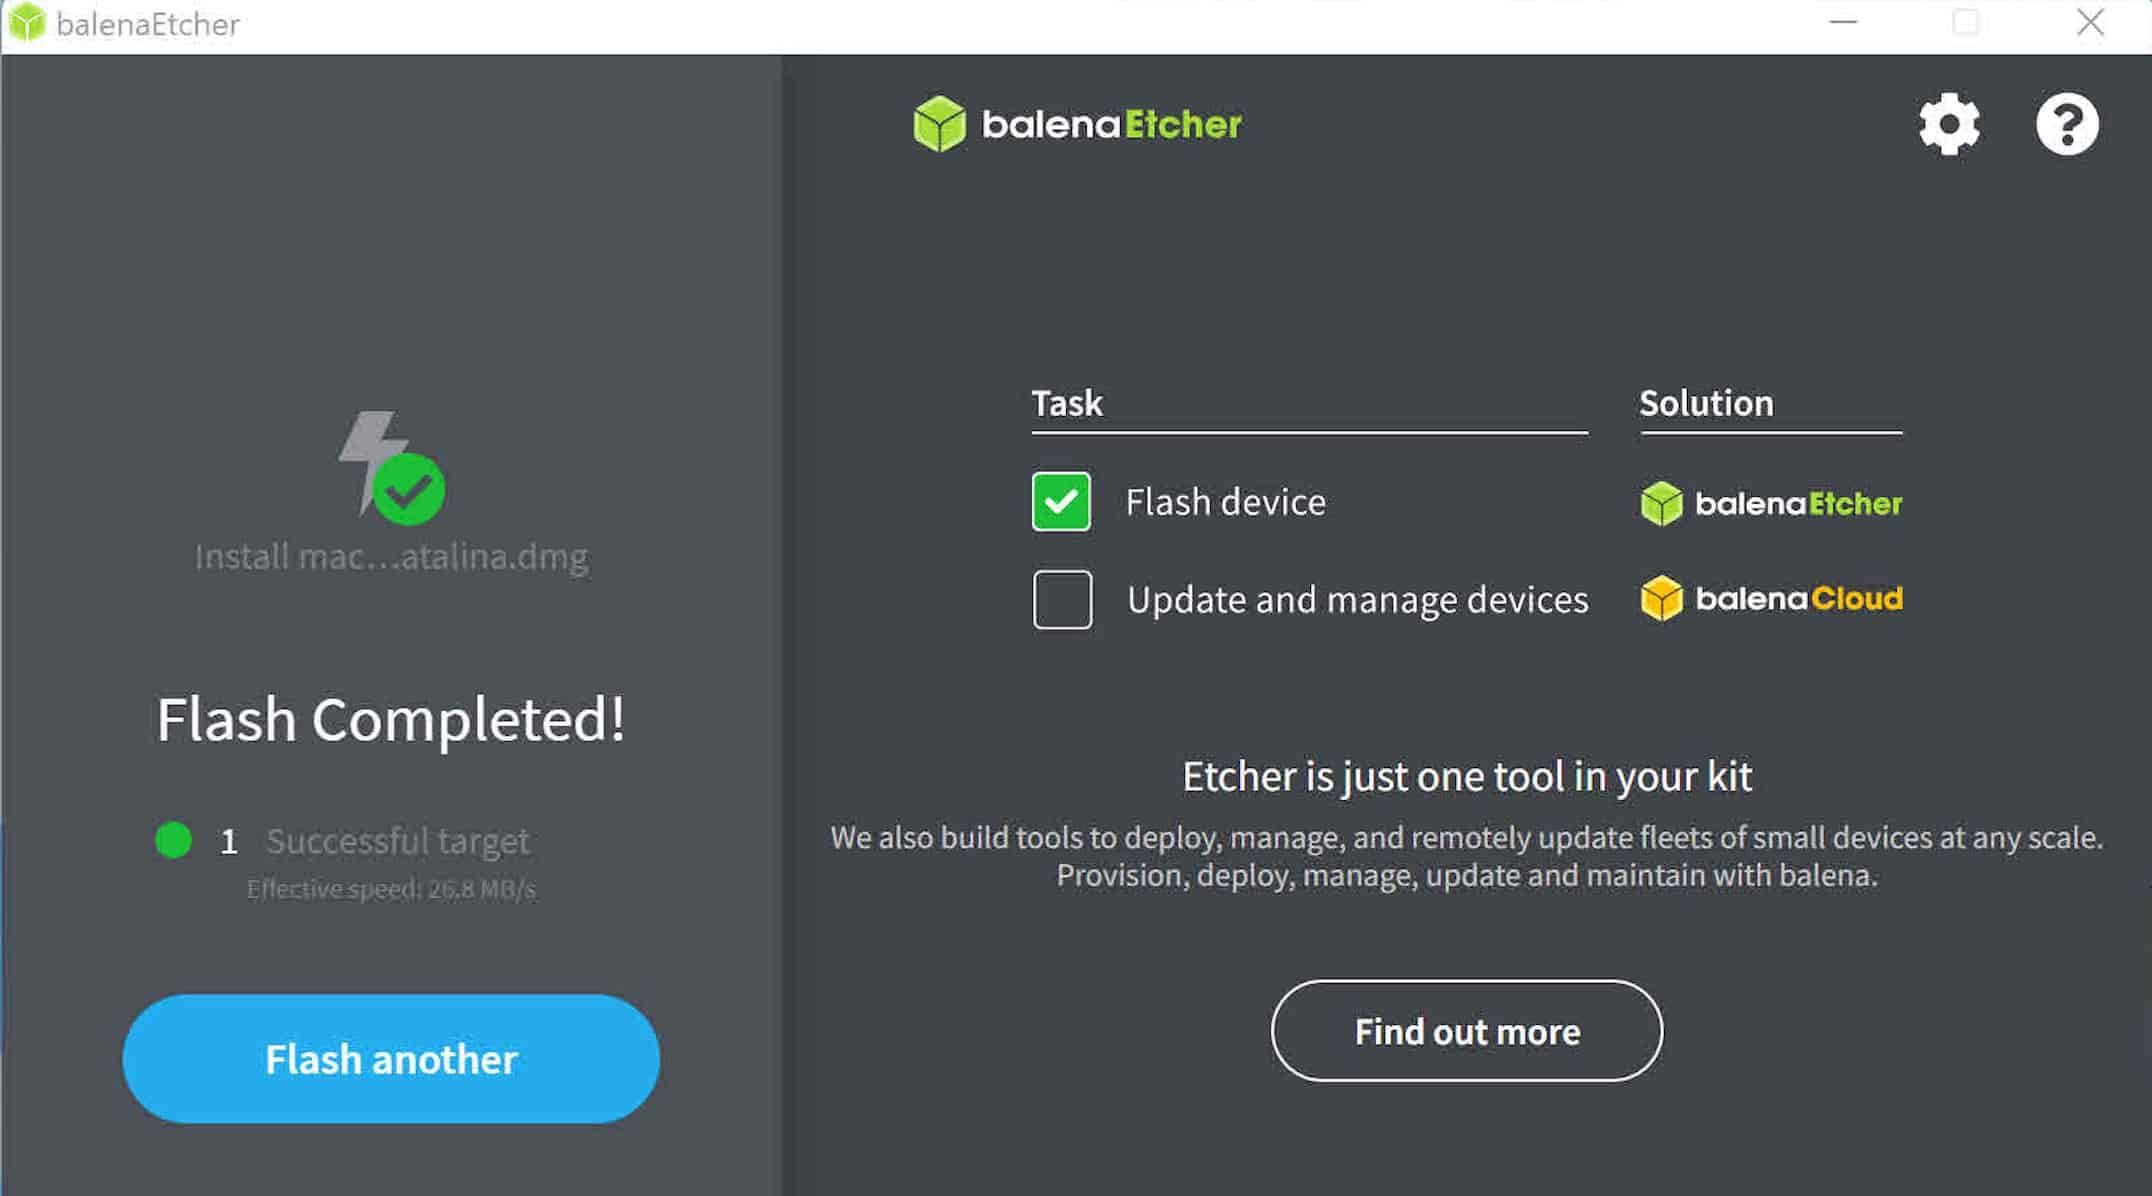
- Flash the macOS DMG file to USB on Windows
Now we will flash the selected macOS DMG file to the USB device from the Windows PC using the Etcher app. Click the “Flash” button to burn the contents of the disk image onto the selected storage device. Please note that all files on the USB disk will be erased during this transfer. Also, if you wish, you can view the estimated time required for building the USB installer on the left side of the app.

- Disconnect the macOS USB installer safely from the PC.
Once Etcher finishes flashing the DMG file to the assigned DVD, you will see a message saying, “Flash completed”, as shown below. The macOS installer is now ready. Safely eject the pen drive from your system at this point. The contents of the newly created disk on Windows will be exactly the same as if you had made the USB on a Mac.


The above guide explains the step-by-step instructions on how to flash a DMG file on a PC and create a bootable macOS installer. If you prefer an alternative method or want to use a DVD disc instead, follow the steps using TransMac, which is detailed below.
Burn DMG to USB on Windows PC using TransMac
You can burn a DMG file to a USB using Balena Etcher, but an alternative tool, TransMac, offers additional features. Unlike Etcher, TransMac can also be used for burning DVDs. It has several other options than Etcher, such as inspecting the internal files within a DMG and erasing a USB stick for macOS, and a few more.
To start with, you’ll need to download and install the TransMac app for Windows from the tools section, given above. Once you do that, plug your USB drive into your computer, it assists the program in detecting the USB immediately on its launch. Now open the TransMac by right-clicking on the program’s icon and selecting “Run as Administrator.” If you’re using the program’s free trial version, you may have to wait approximately 15 seconds before it takes you to the UI.
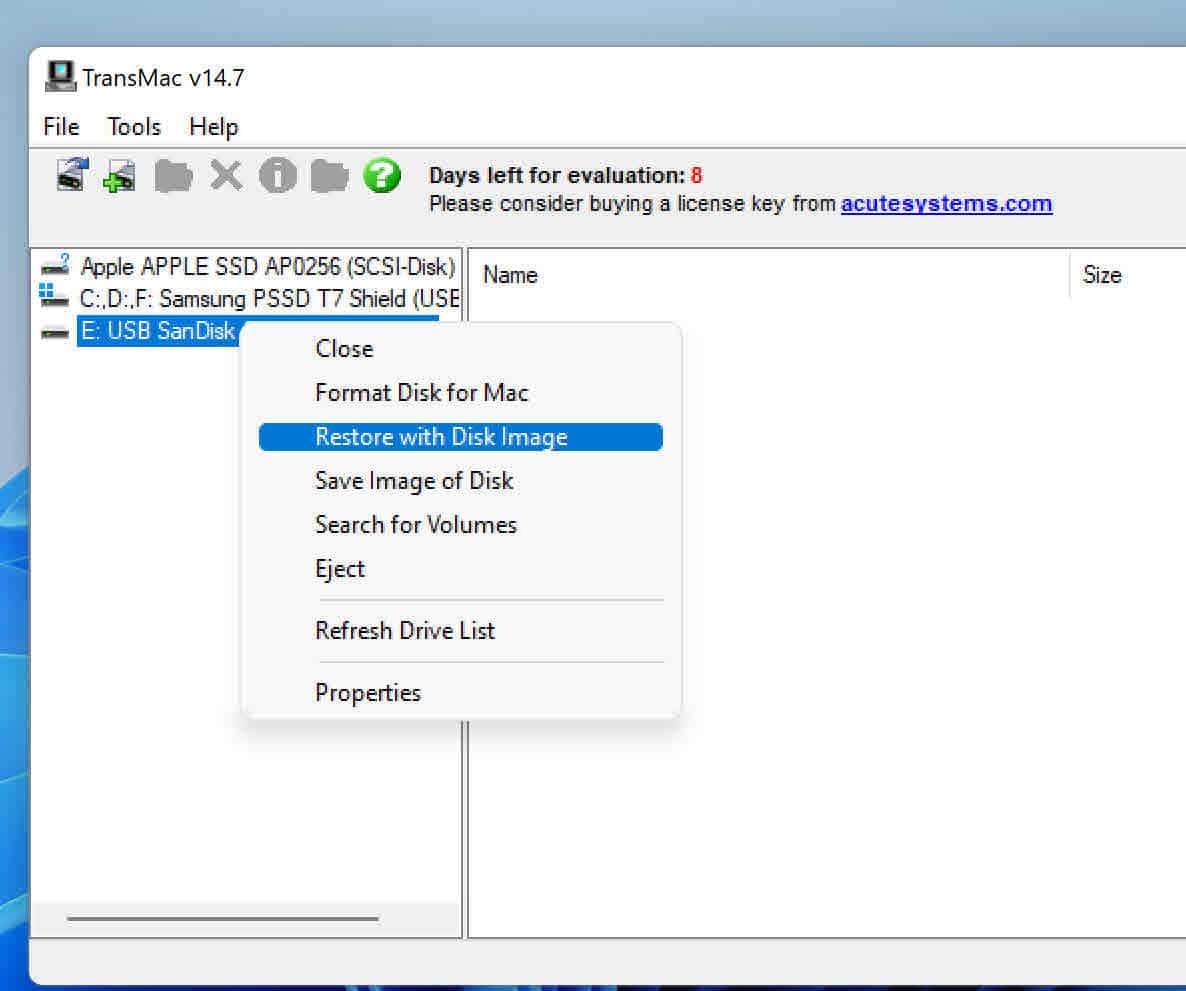
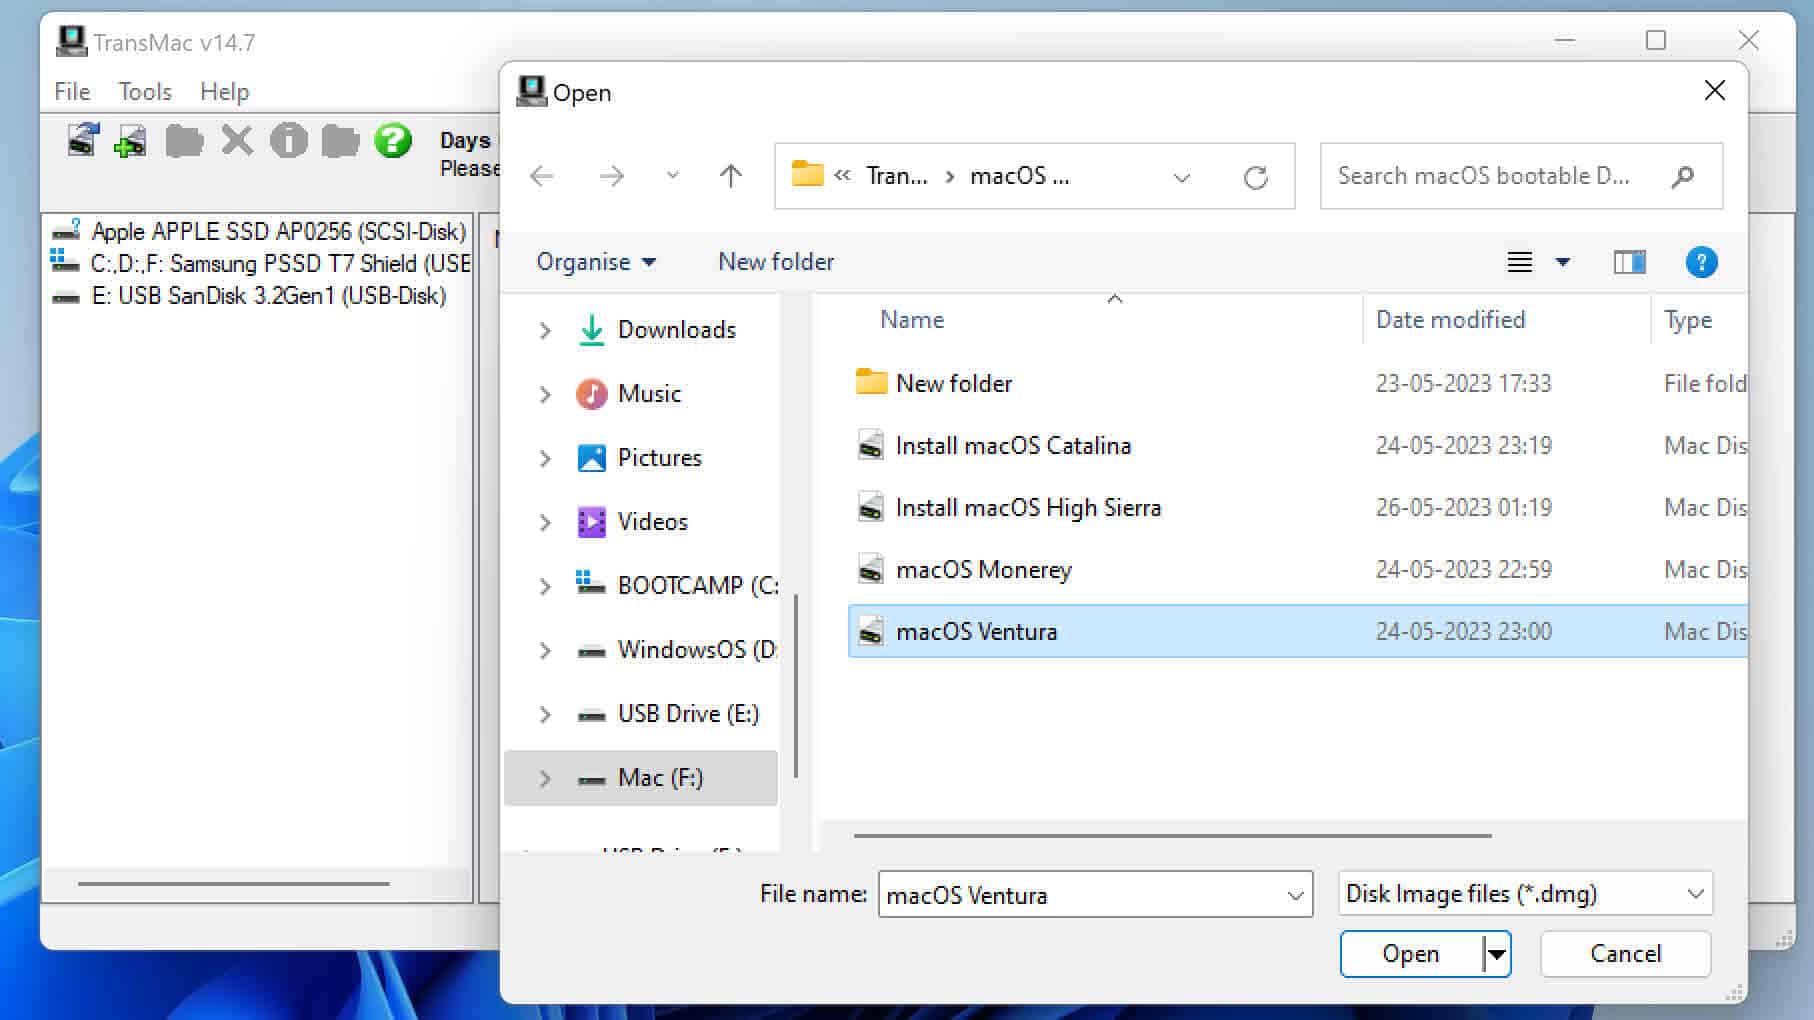
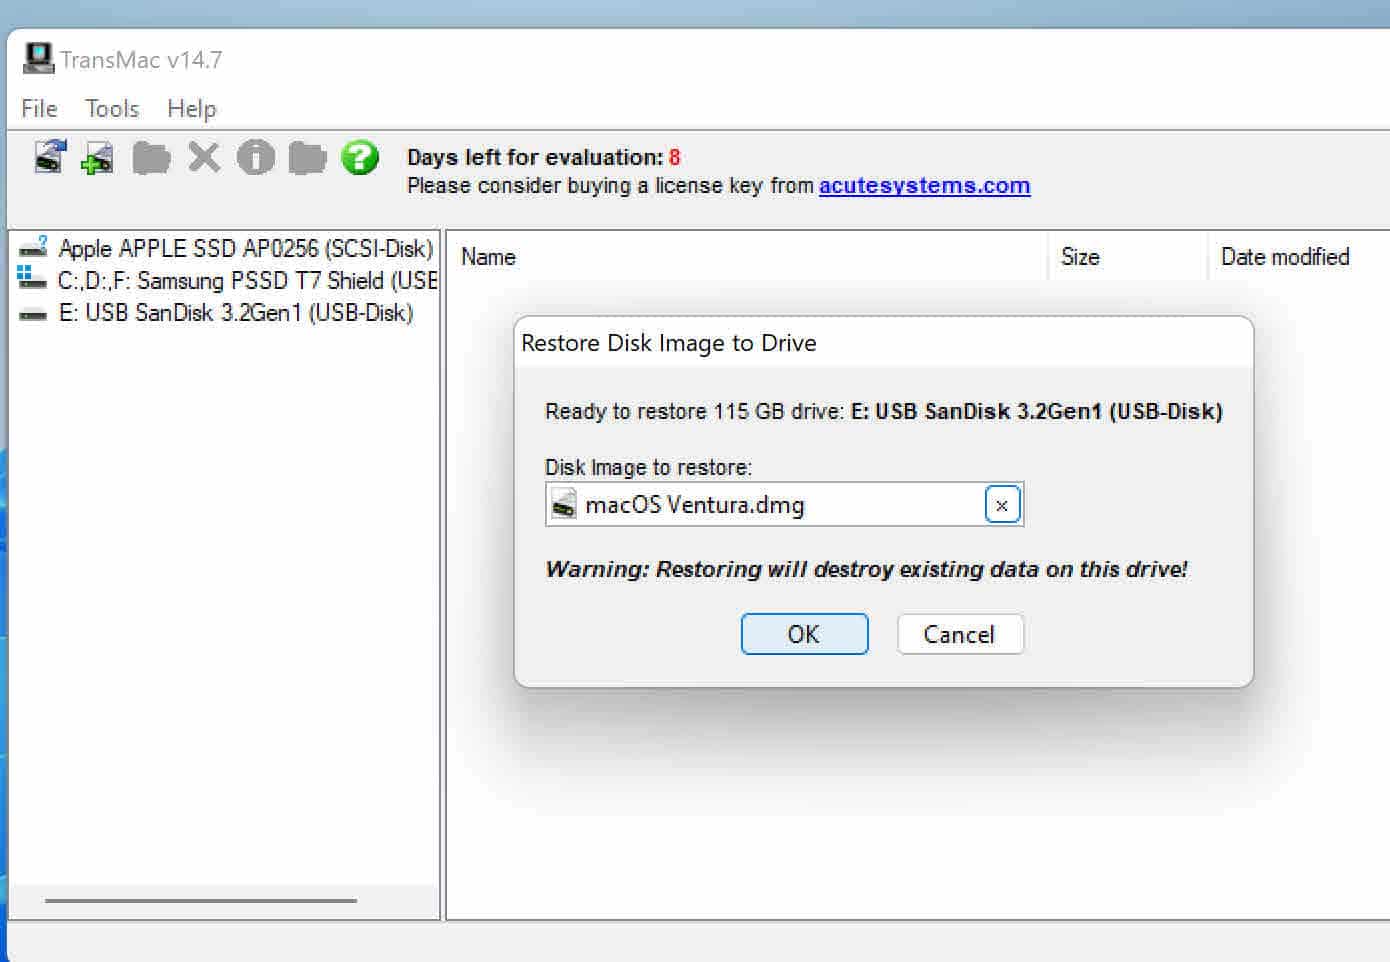
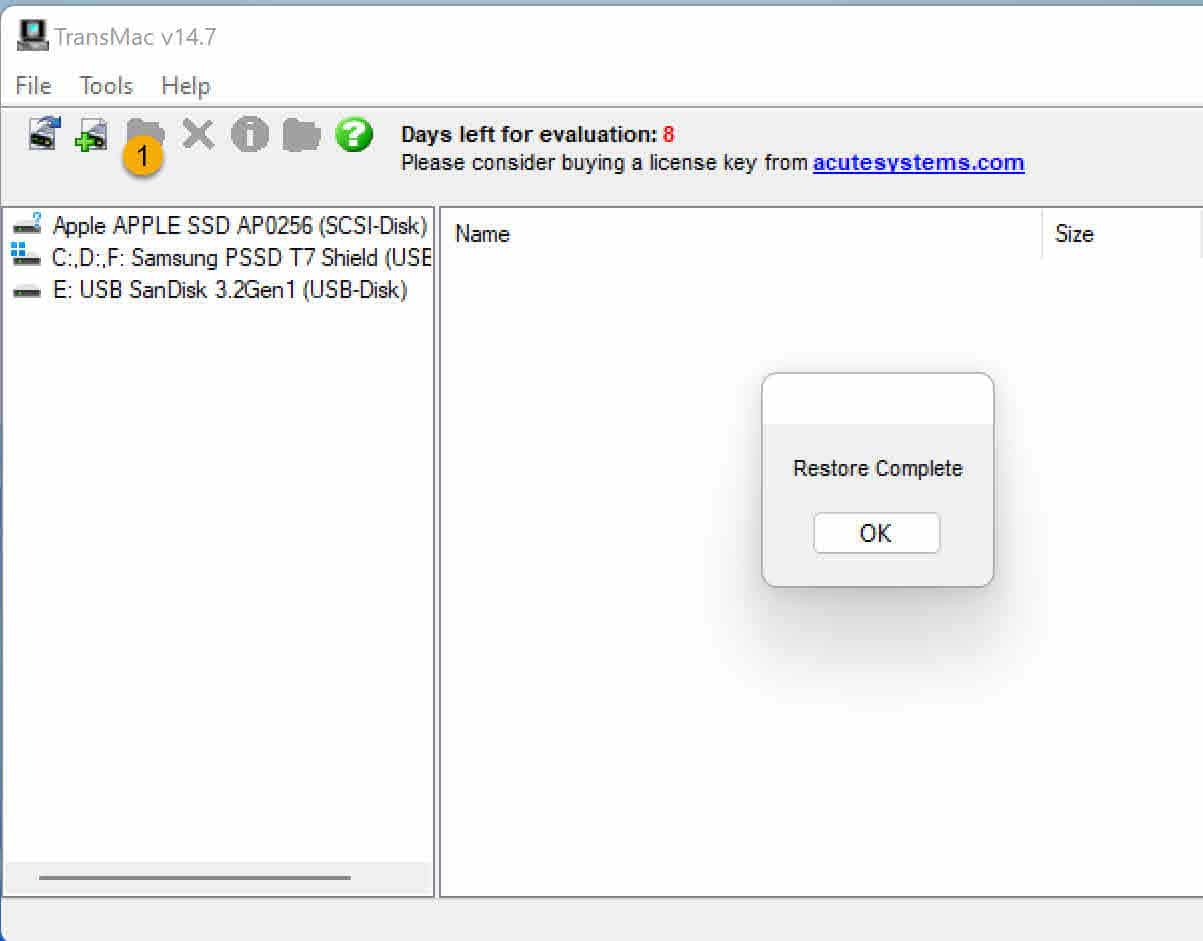
Next, you’ll notice your USB device listed in the program’s interface. If TransMac cannot detect your storage device, click on the “Tools>Refresh” option in the Menu. Then, right-click on your USB device and select the “Restore Disk Image” option. Restoring the disk image means we are transferring the contents of the DMG file (the macOS disk image) onto your USB drive. As in our Etcher tutorial, find the macOS DMG file using Windows Explorer and click “Restore.” Don’t take any actions if you see warning messages – proceed with the process and wait until TransMac does its work, burning the macOS DMG file and creating a USB installer. And that’s it! You’ve successfully created a Mac-compatible USB installer on Windows using TransMac.
Burn DMG to make macOS install DVD on Windows
Let’s discuss how to burn a macOS DMG file onto a DVD on Windows using TransMac. This method is for those with older PCs equipped with a DVD drive. And the DVD drive must be able to write and read dual-layer DVDs. If your computer doesn’t have a built-in DVD drive, you can also consider purchasing an external DVD writer for this purpose.
Another concern is the size of the macOS DMG file you intend to burn. Sometimes, this file can exceed 8.5GB, which is too large for a dual-layer DVD, and your disk may be unable to store all the data. Given that macOS installer files can reach sizes up to 12GB these days, it’s not feasible to create a macOS install DVD for newer versions of the OS in this way. That being said, for macOS Catalina and prior versions, the DMG file sizes are under 8.5GB, making them fully compatible.
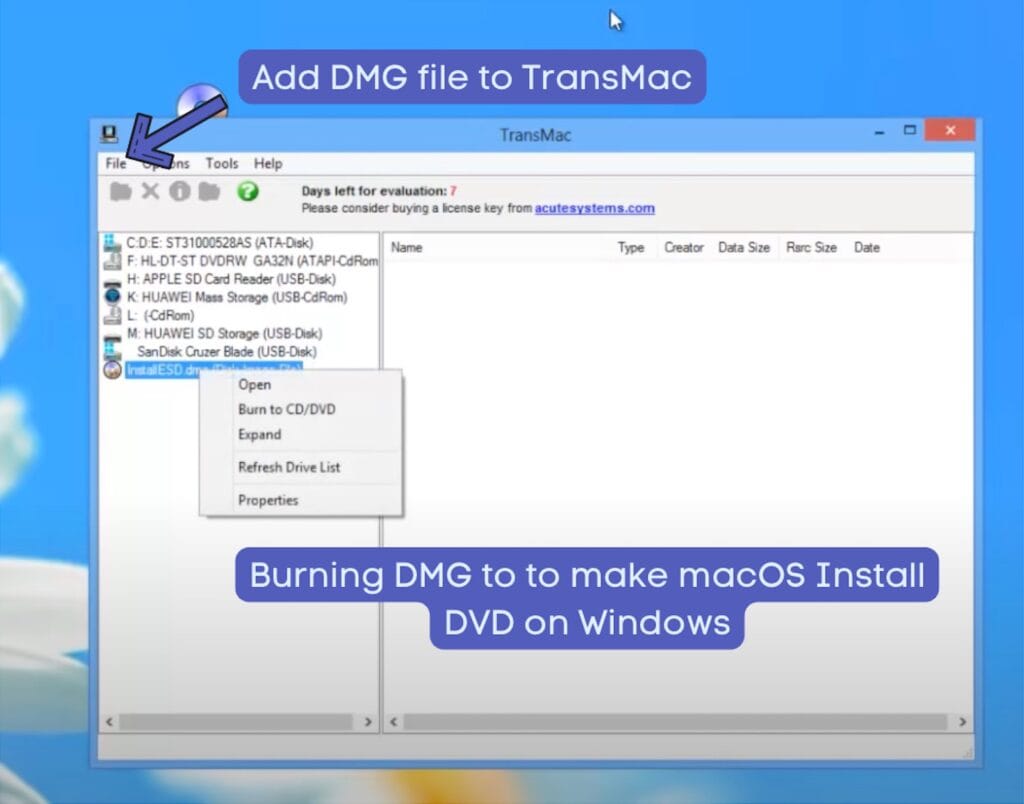
Burning a DMG file to a CD/DVD on TransMac works differently from the USB process we explained earlier. First, you need to add (File>Open Disk Image) the macOS DMG file to TransMac. Then, right-click on the DMG file and select the “Burn to CD/DVD” option, as demonstrated in the video above. Please note that this video is quite old and was created for our channel to illustrate how to create a macOS Mountain Lion install DVD on Windows using TransMac. Despite its age and production style, the steps are clearly outlined and should be easy to follow.
Conclusion
Windows supports several tools that can deal with the DMG file format that evolved in the macOS ecosystem. Our favourite is Balena Etcher, especially if the task is to flash a macOS disk image to a USB disk. It is a multi-platform tool that offers both a portable version and supports old versions of Windows.
However, for DVDs, or burning macOS installer to a disc, we use TransMac. It has a long history of being a reliable tool for burning DMG files on Windows. While this software isn’t free, it offers a 15-day trial which is enough for one-time tasks, such as creating a bootable macOS installer and resolving boot-related issues with a Mac.
In conclusion, choosing between these two software depends on the user’s needs. If you are a technician who needs to burn DMG files to USB frequently, Balena Etcher would be the go-to software. However, for regular users who need to burn a DMG to a DVD or perform single-use tasks, TransMac could be an alternative.
The internal files of a Bootable macOS DMG file are similar to those found on a macOS USB disk created on a Mac. Typically, the macOS installer to DMG conversion process can only be done on a Mac. However, several websites provide direct download links for bootable macOS DMG files. A quick Google search will provide these links, allowing you to download the file directly to your Windows PC.
No, the macOS DMG file downloaded from Apple has a different file architecture. This DMG file is not bootable. Hence it won’t help you create a bootable install disk even if you manage to burn or flash the image using TransMac and Balena Etcher.
Yes, Balena Etcher is an excellent and free alternative to TransMac on Windows for flashing macOS DMG to a USB drive. However, I recommend downloading PowerISO if you want to burn a macOS DMG to a DVD, as Etcher doesn’t support DVDs.